Contents
Required tools
Basic setup
Reaper configuration
Adding plugins
Room profiling
Finishing up
Closing notes
Introduction
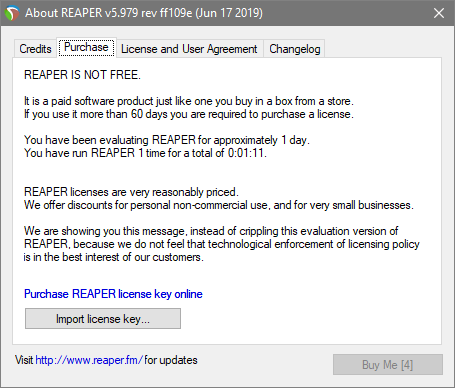
You'll be using a digital audio workstation called Reaper, and some VST plugins to process the mic signal. After processing the raw signal from your mic, you'll send the modified signal to a virtual audio cable, which acts as a new device that any app can use as a mic. Reaper is not totally free, but there is no actual limit on how long you can use it for, which gives you plenty of time to decide whether you use it enough to pay for it.
Some images in this guide were scaled down so that the guide can more easily be viewed on a small screen. Those images will appear distorted as a result of this. If you'd like to see any particular image without scaling, just click it and it should open in a new window at full size.
Required tools
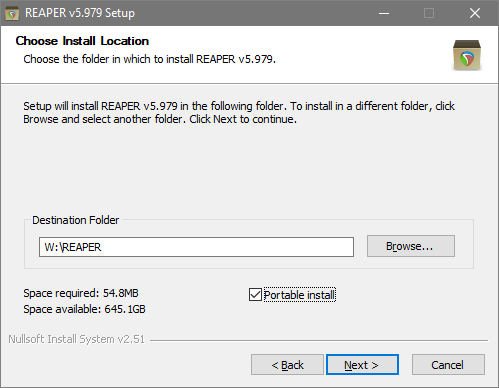
http://reaper.fm/download.php
VB-Audio Virtual Audio Cable
https://www.vb-audio.com/Cable/
BuzMaxi3
https://freevstplugins.net/buzmaxi3/
RBTray
http://rbtray.sourceforge.net/
Basic setup
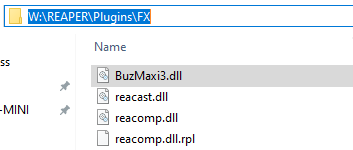
Unzip buzmaxi3_v1.3.zip and copy BuzMaxi3.dll into REAPER\Plugins\FX folder.
Unzip VBCABLE_Driver_Pack43.zip and launch VBCABLE_Setup_x64.exe to install the cable.
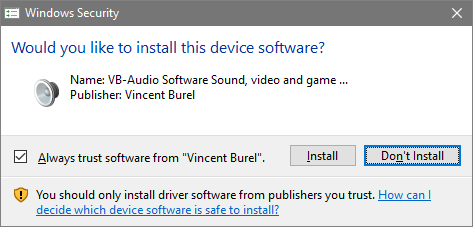
Press [Install Driver] and press [Install] when asked to install the Windows device driver.
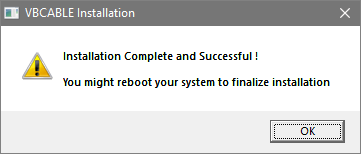
The installer will ask you to restart your computer. DON'T DO THIS YET!
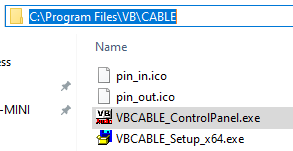
Navigate to C:\Program Files\VB\CABLE and launch VBCABLE_ControlPanel.exe
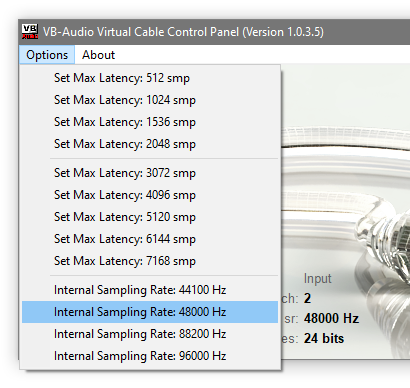
Now select Options > Internal Sampling Rate.
If you're streaming on a single PC that only plays PC games then 44100 Hz (CD Quality) is usually fine. If you're using any kind of capture card like the Elgato HD60 Pro, for instance, then select 48000 Hz (DVD Quality) because capture devices are often locked to 48000 Hz and mixing frequencies between your devices can cause problems.
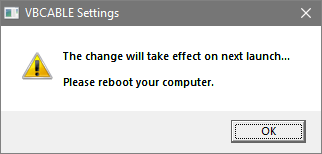
You'll need to restart your computer before these changes are applied. Restart your computer now!
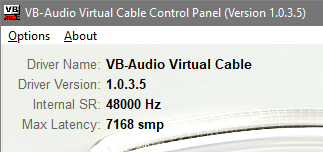
Navigate to C:\Program Files\VB\CABLE and launch VBCABLE_ControlPanel.exe again. You should notice that the Internal Sampling Rate has now changed to whatever frequency you selected earlier.
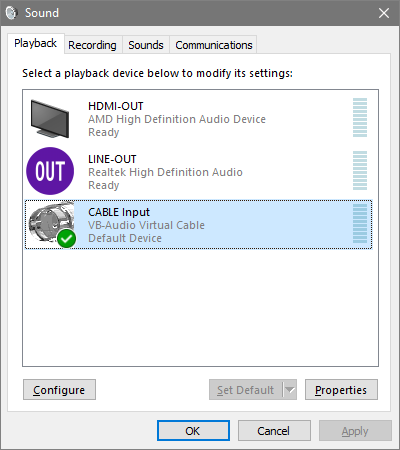
Open your Sound control panel in Windows and go to Playback. You'll see CABLE Input has appeared and has been set to the default device. This is no good because you won't have any kind of sound output on your computer now!
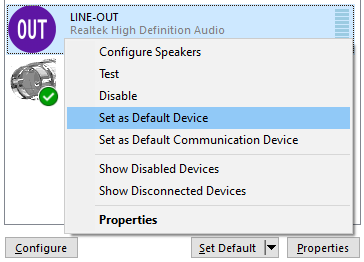
Find the sound device that you normally use to listen to audio and right click it then select Set as Default Device to get your desktop sound back.
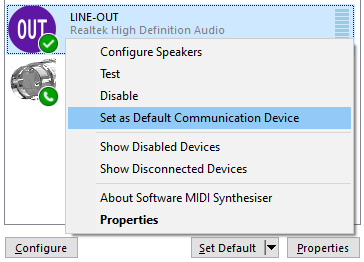
Do the same again and select Set as Default Communication Device so that you'll be able to hear sound when talking with friends in apps like TeamSpeak or Discord.
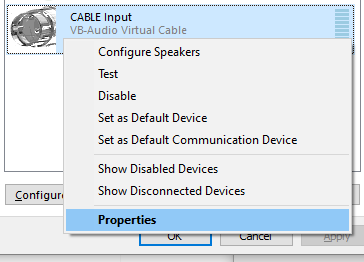
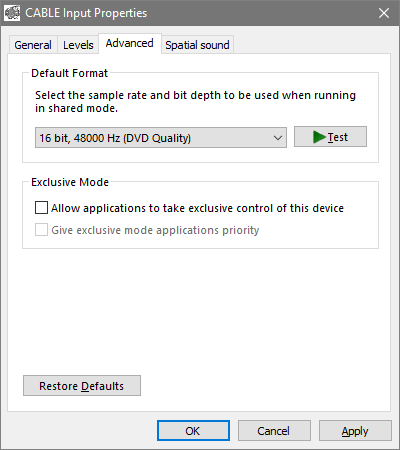
Now that your desktop audio has been restored, right click the CABLE Input device and select properties.
Go to the Advanced tab and change the default format to the same as the internal sampling rate you selected in the VBCABLE_ControlPanel.exe settings app. Also disable Exclusive Mode because we want multiple apps to be able to access this device. Press [OK] when you're finished.
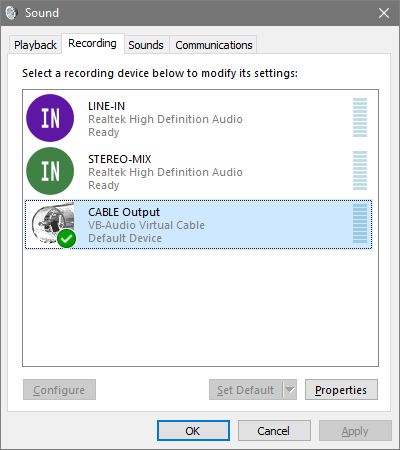
Switch over to the Recording tab and you should notice there is also a CABLE Output device here. Seeing as this will eventually be your mic, there's no need to set default device and default communication device.
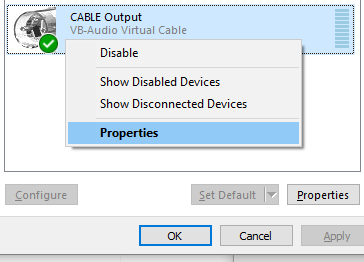
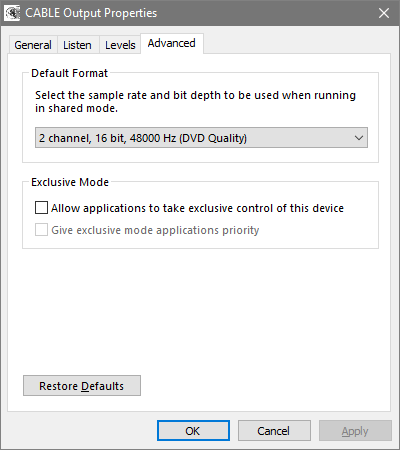
Right click the CABLE Output device and select properties.
Go to the Advanced tab and change the default format to the same as the internal sampling rate you selected in the VBCABLE_ControlPanel.exe settings app. Also disable Exclusive Mode because we want multiple apps to be able to access this device. Press [OK] when you're finished.
Reaper configuration
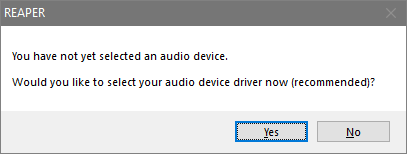
On first launch, Reaper will ask if you want to select an audio device. Choose yes.
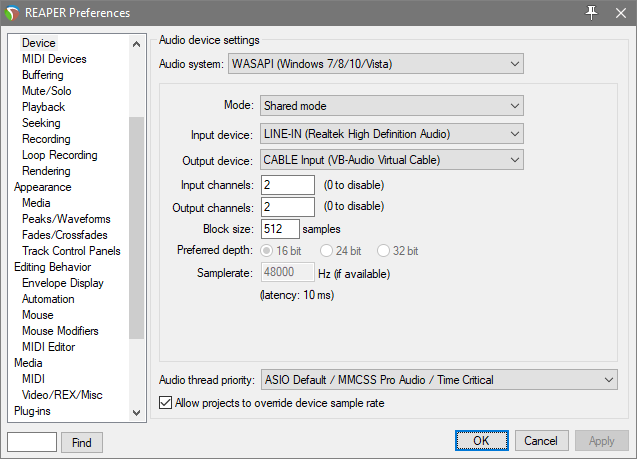
By default, the audio system should be WaveOut, which has the best compatibility but the highest latency. Assuming that you're using a modern version of Windows like Windows 10, you should be able to use WASAPI without any issue. I use Kernel Streaming because it's more stable and has the lowest latency for my particular setup. Not all device drivers support Kernel Streaming, but WASAPI should always be available and is recommended.
Select your mic as the input device and CABLE Input as the output device (this will soon be your new mic).
Press [OK] when you're finished and Reaper should now use your selected device. If it does not display the device in the top right corner, restart Reaper and it should now appear and work normally.
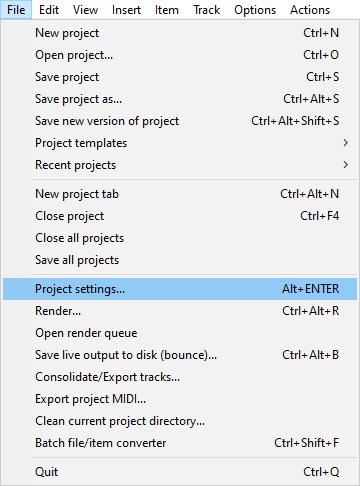
Select Project settings from the File menu.
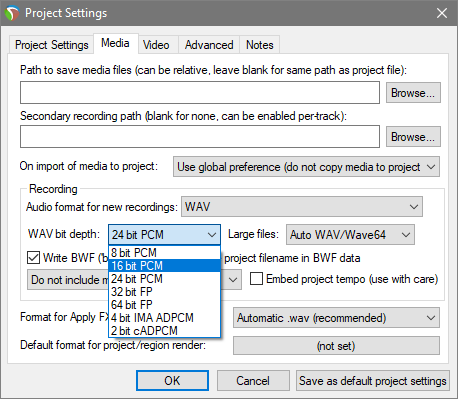
Switch to the Media tab and change the WAV bit depth to 16-bit PCM. To finish the initial configuration process, press the [Save as default project settings] button so that all projects run at 16-bit. Many computers will default to 24-bit PCM, which is not required and wastes resources. Unless you're trying to record vocals for music, 16-bit is fine.
Adding plugins
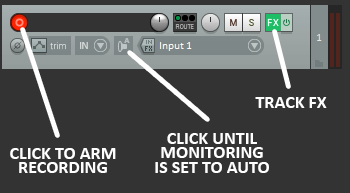
Press the Arm Record button and then press the Record Monitoring button until it's set to Auto. Finally, open the Track FX Window.
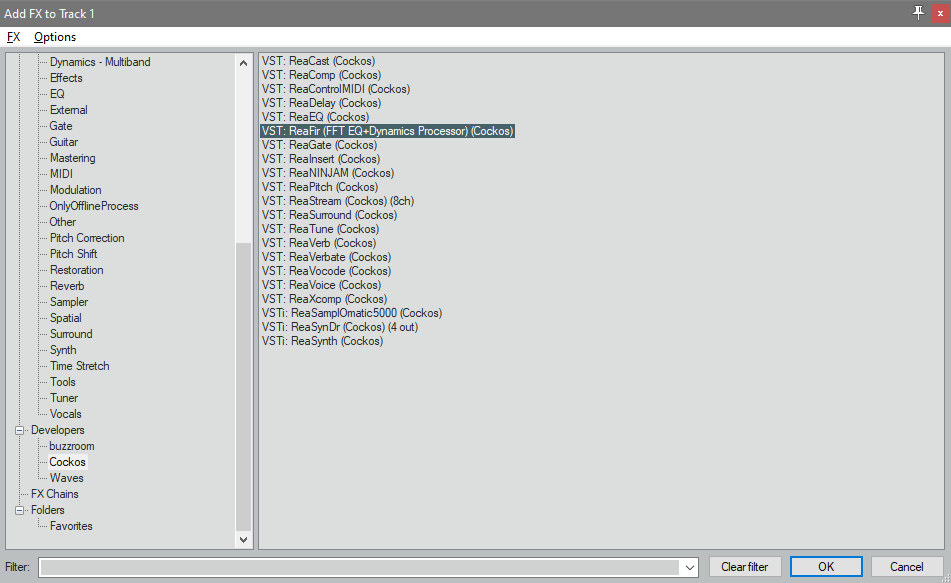
Choose Developers > Cockos > VST: ReaFir and press [OK] to add this effect.
Press [Add] at the bottom of the Track FX Window to add another effect.
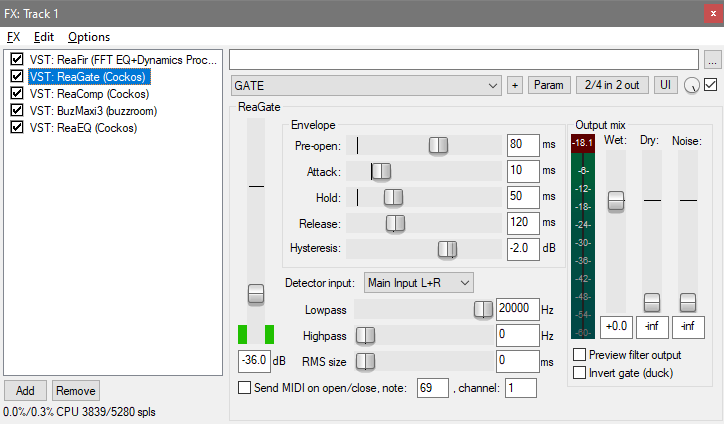
Choose Developers > Cockos > VST: ReaGate and press [OK] to add this effect. Copy the settings as shown in the image below.
Press [Add] at the bottom of the Track FX Window to add another effect.
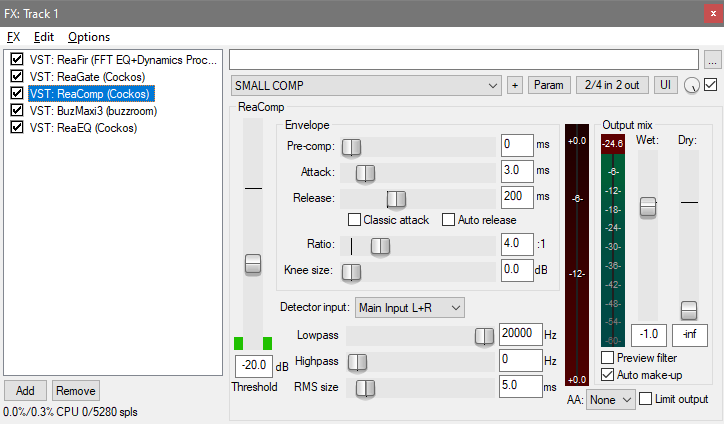
Choose Developers > Cockos > VST: ReaComp and press [OK] to add this effect. Copy the settings as shown in the image below.
Press [Add] at the bottom of the Track FX Window to add another effect.
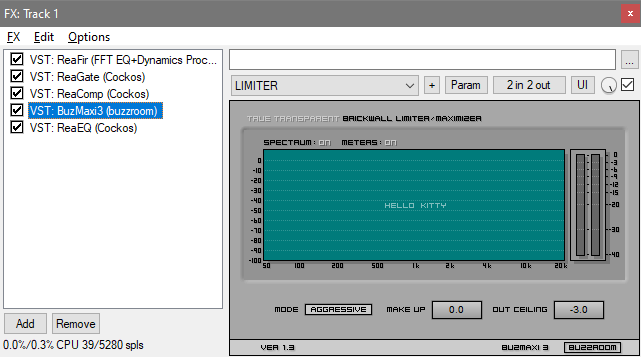
Choose Developers > buzzroom > VST: BuzMaxi3 and press [OK] to add this effect. Copy the settings as shown in the image below.
Press [Add] at the bottom of the Track FX Window to add another effect.
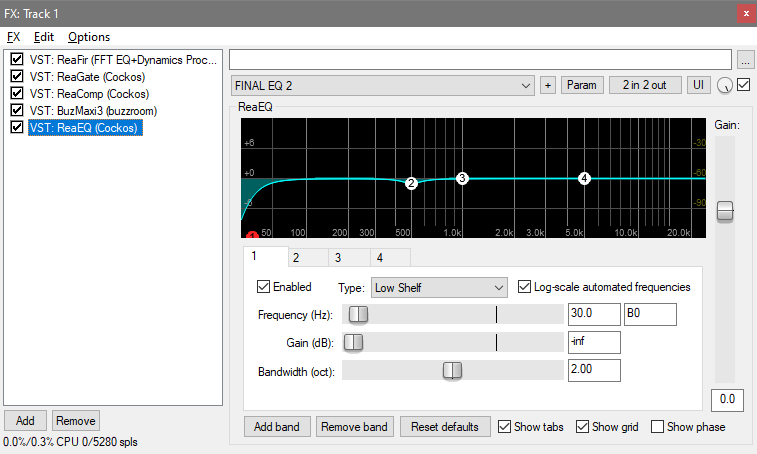
Choose Developers > Cockos > VST: ReaEQ and press [OK] to add this effect. Copy the settings for band 1 as shown in the image below.
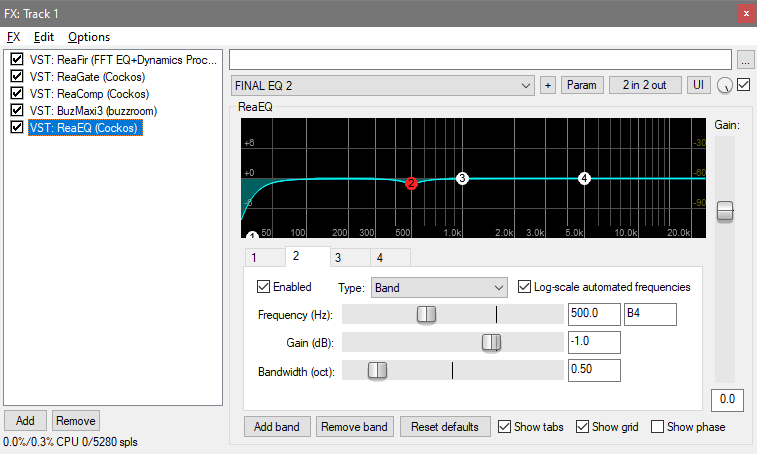
Copy the settings for band 2 as shown in the image below.
Room profiling
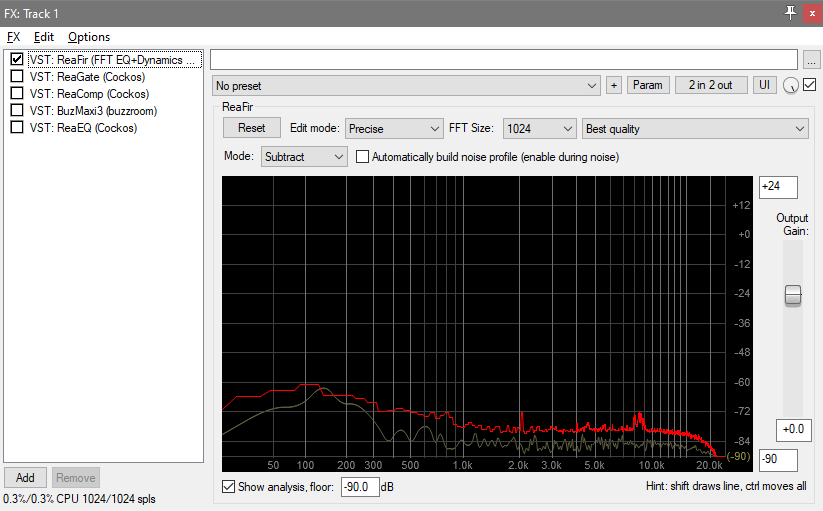
Start by changing the FFT Size to 1024, the Mode to Subtract and check the box that has just appeared which says Automatically build noise profile. It's important that your room is as noisy as it would be while you're playing games because the noise of computer fans and anything else is what needs to be removed from your voice stream. The profile responds to all frequencies, so it's also important that as soon as you enable profiling that you don't make any sudden noises like coughing, typing on your keyboard, clicking your mouse, and so on.
It may take you a few tries to build a noise profile that resembles a realistic view of your average room noise, but generally, you only want a guide because you're not going to use a precise filter. The graph will change based on ambient sound levels and after a while there will be little to no changes. At this point you'll need to un-tick the Automatically build noise profile box. If there are one or more sudden noises that ruin the profiling process, un-tick and re-tick the Automatically build noise profile box. Normally, after around 5 to 10 seconds of profiling, you should have something that looks similar to the image below.
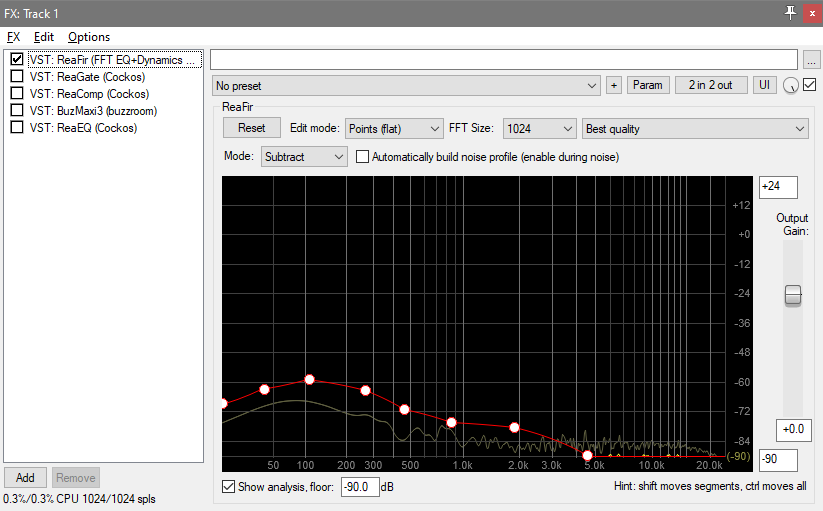
Change the edit mode from Precise to Points (flat) and you'll see the accuracy of the graph change from complex to very simple. Hopefully, your incoming audio (yellow) stays below the filter ceiling (red). It may occasionally pop over or it may be very much below the ceiling, so you'll need to tweak it until the incoming audio follows the ceiling. In other words, the red line has similar curvature to the yellow line AND the yellow line sits slightly below the red line.
Click anywhere along the red line to add a point. Click and drag a point to move it. Hold the ALT key and click a point to remove it from the graph. An example of an acceptable filter is shown in the image below.
Now that all of your plugins have been configured, be sure to enable them!
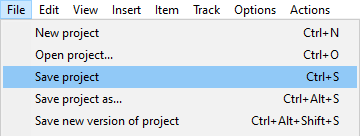
Don't forget to save your project file, otherwise you'll have to do all of this again!
Finishing up
Don't forget that if Reaper isn't open then your CABLE Output will be silent!
Closing notes
The default format and exclusive mode options for sound devices discussed earlier in this guide should also be applied to other sound devices installed on your system. If all devices use the same frequency, there is less overhead, and less chance of any issues due to mismatched audio streams that you're trying to mix together.
Processing audio in real time usually adds a noticeable delay, which can be best observed when streaming or recording while using a web cam. You might notice that you'll appear to speak but your voice follows sometime afterwards. In OBS studio, this is resolved by right clicking the mixer and selecting advanced audio properties. Adding a negative sync offset for your mic should synchronise your voice with your cam. You'll need to record a few test clips with different offsets to find the best match. For reference, my offset is -200 ms.
I added RBTray to the required tools list, but it's not really required at all. RBTray is a great tool that allows you to minimise most Windows apps to the system tray. It's useful because many apps (Reaper included) don't have this functionality. To use RBTray, just right click the minimise box of an app and it will be made invisible and an icon for it will be placed in the system tray. When you want the app back, simply click the icon in the system tray and the app will reappear. If you add a shortcut to RBTray in the Windows startup folder, you won't need to launch it every time you want to use it.
Last updated: 2019-06-22

